
What are the possible layout configurations with Dualsun SPRING?
SPRING4 In portrait mode
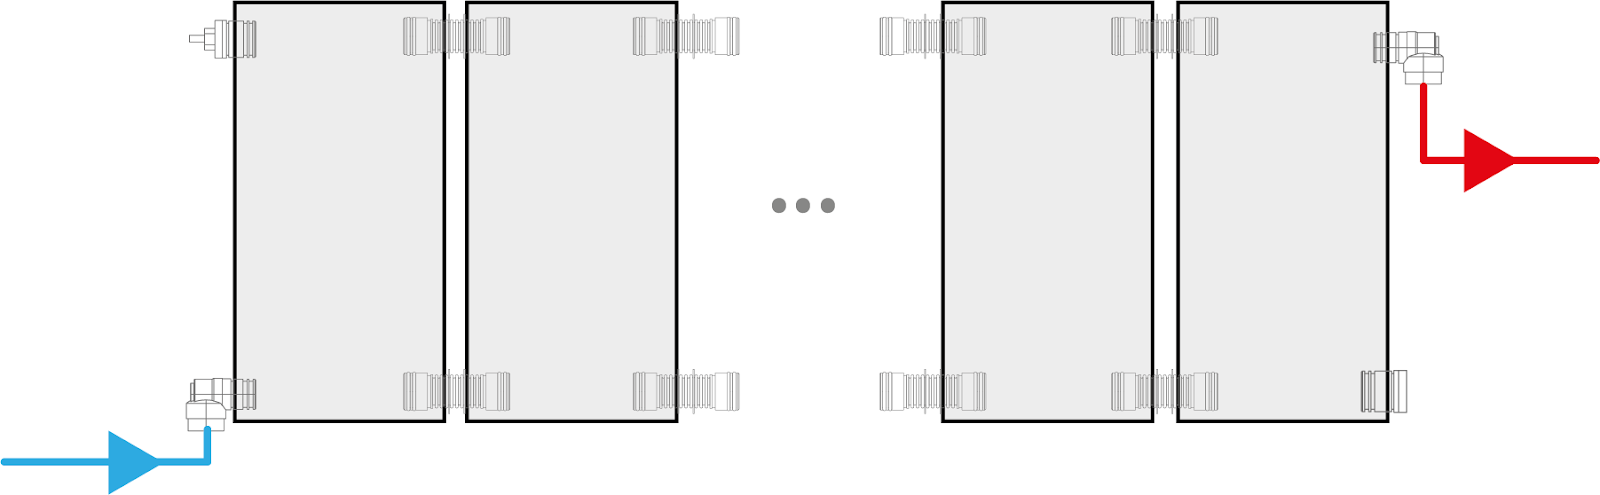
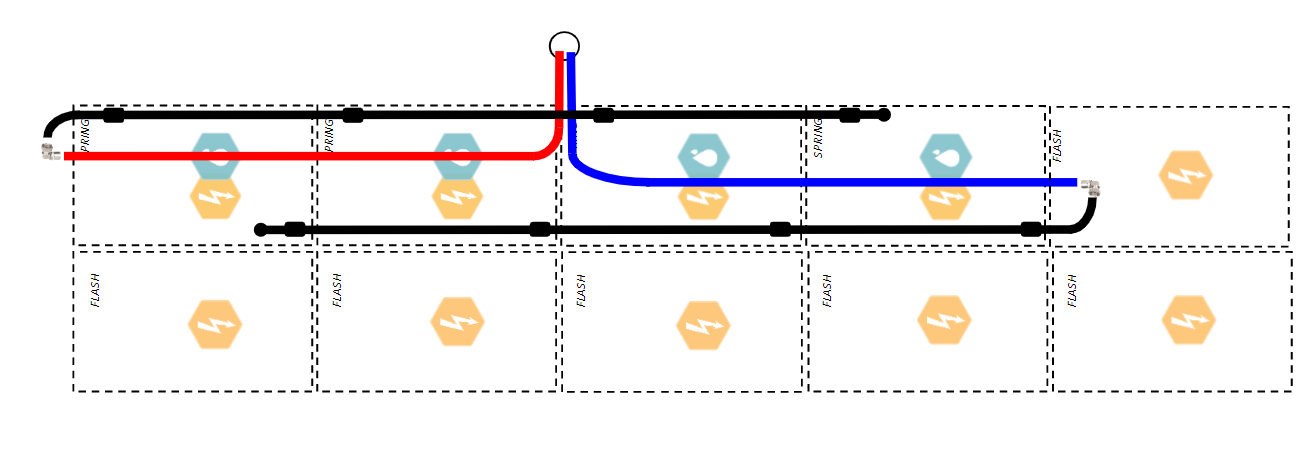
Installation on a single line
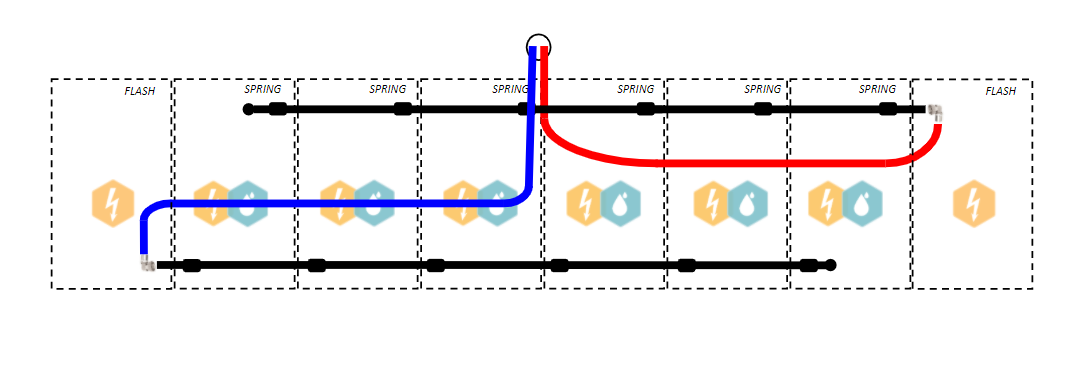
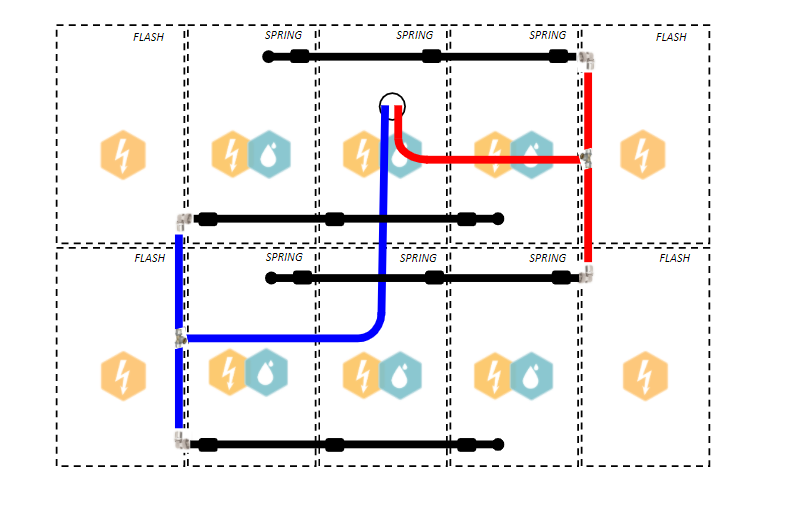
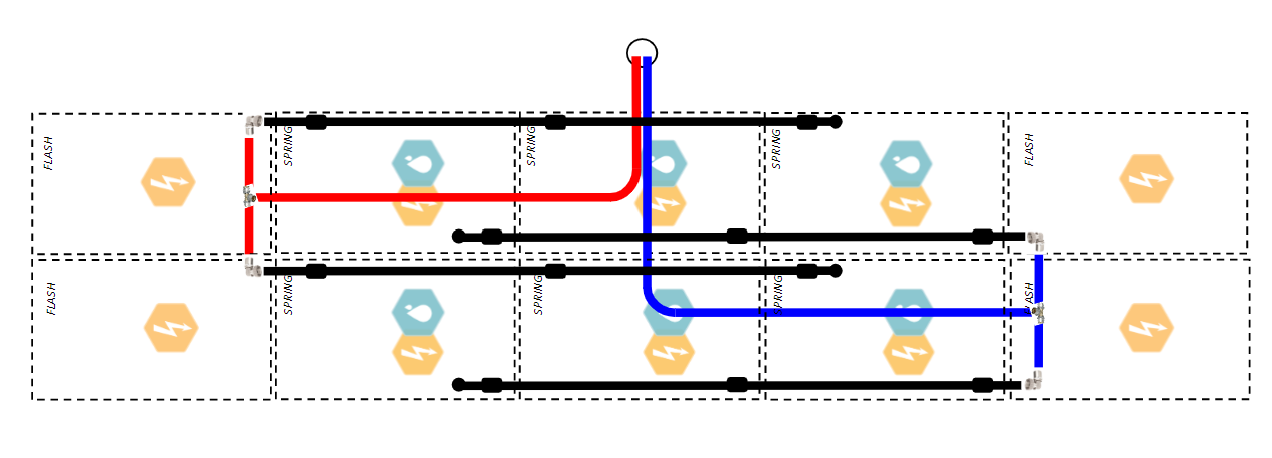
Installation on 2 or more lines
Depending on the number of panels, balancing valves can be needed.
Homogeneous lines : Thichelman balance can be used if the panel fields are identical (with the same number of panels assembled in the same configuration). Hydraulic lines for the entry and exit of the fluid must be the same as per the following pattern.

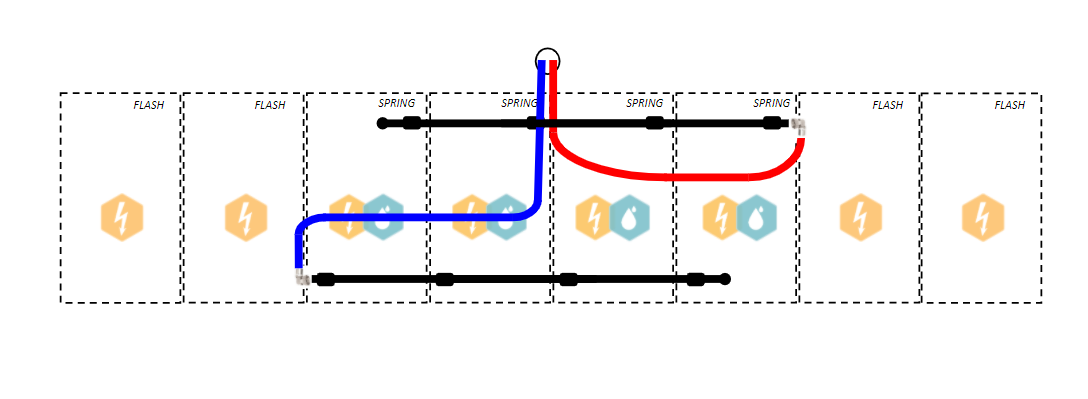
Non homogeneous lines : When the balancing with tichelmann is not doable, or the panel field are not homogenous (number of panels different for exemple), the installation of balancing valve is required. Sizing of the valves depends on the number of panels per lines and the nominal flow required see : Installation, use, maintenant manual Dualsun SPRING4 5.5.3. Hydraulic balancing of panel fields for Dualsun pressurized system
Whatever the configuration, in order to optimize the filling of the panels it is important to not exceed a certain number of panels per line : What is the maximum number of SPRING panels that can be connected in series on the same branch?
Connexion direction
All the hydraulic connections can work with SPRING4. Though in order to optimize the thermic production we recommend the Z setup : inlet at the bottom of the panel and outlet on the opposite top of the panel.
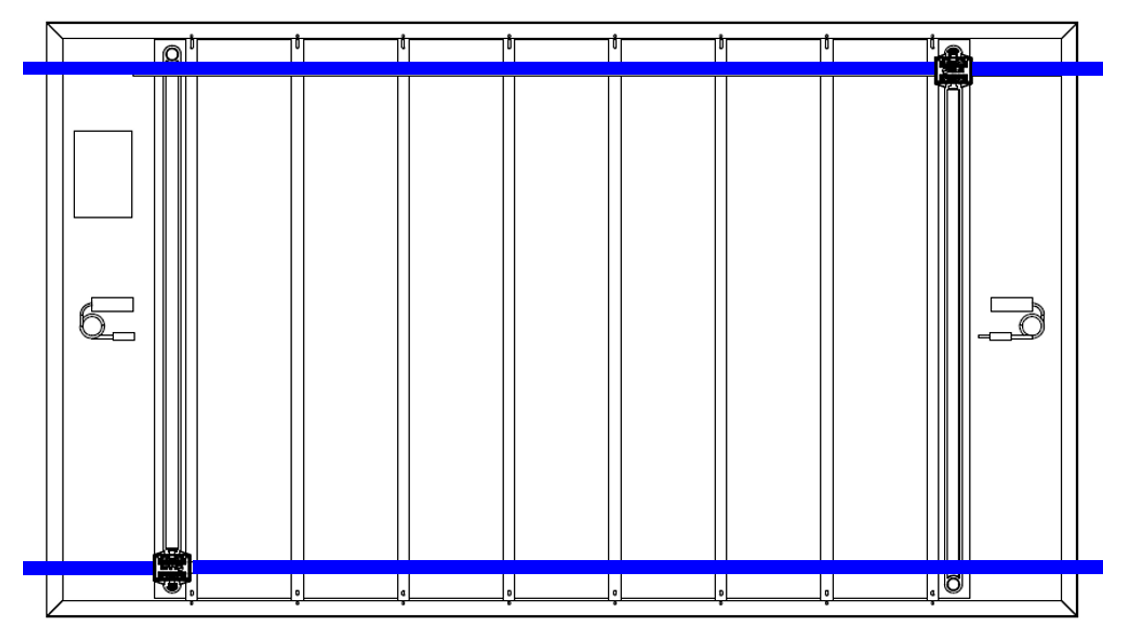
SPRING4 in landscape mode
⚠️ SPRING4 in landscape mode, and landscape connexion is impossible
⚠️ Finned SPRING4 used coupled with glycoled water to water heat pump cannot be installed in landscape mode
⚠️ Installation of non insulated and insulated SPRING4 in landscape mode with portrait connexion is possible under certain conditions.

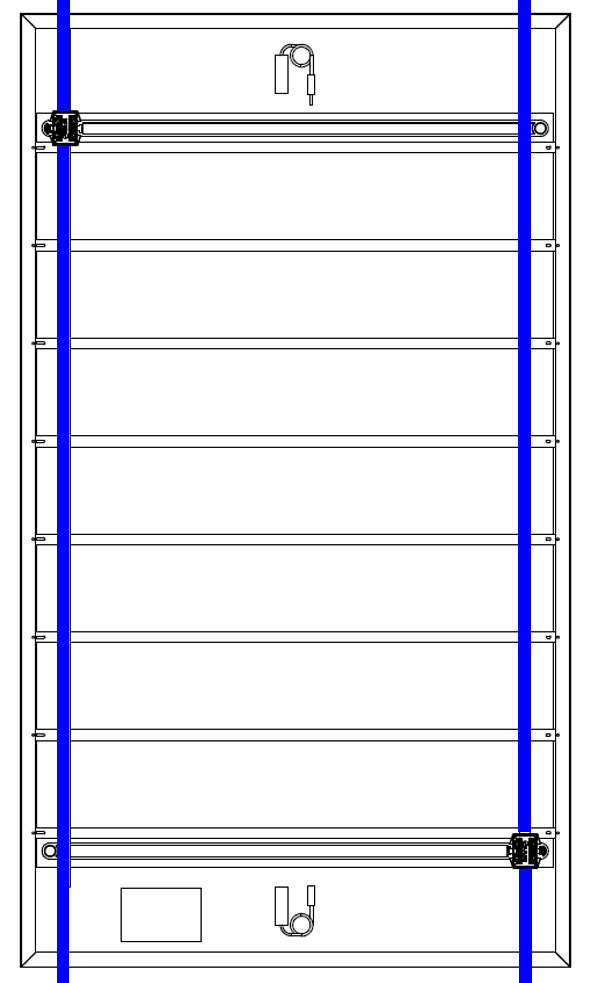
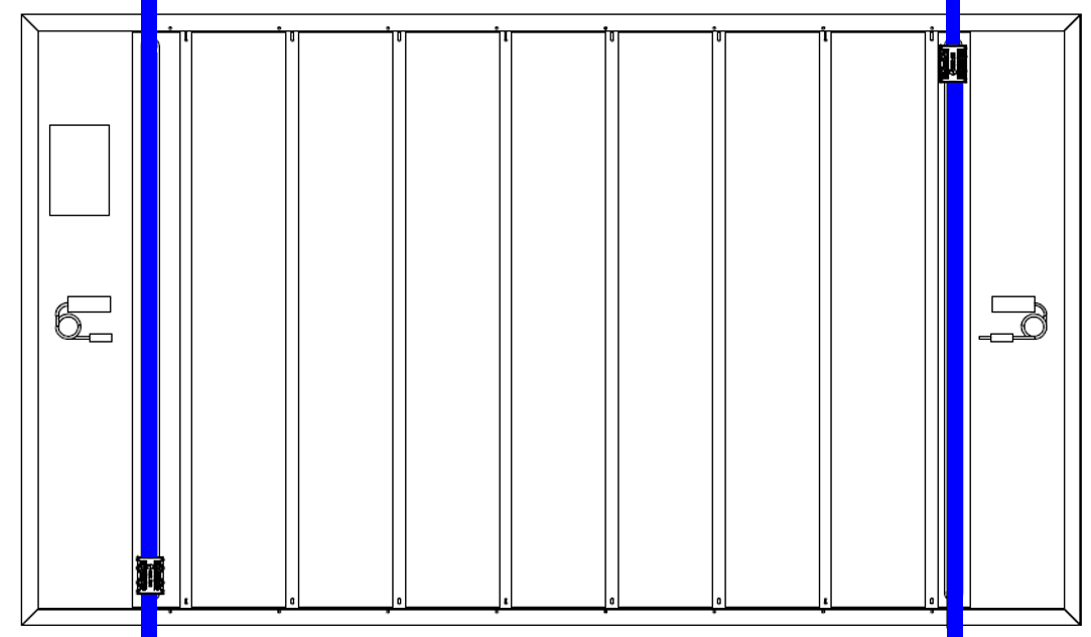
The only way to instal SPRING4 in landscape mode is to connect them as portrait.
Therefore it is mandatory for the rails to be verticals with clamps on the long side (impossible to have the rails installed horizontally as they would be in contact with manifold ).
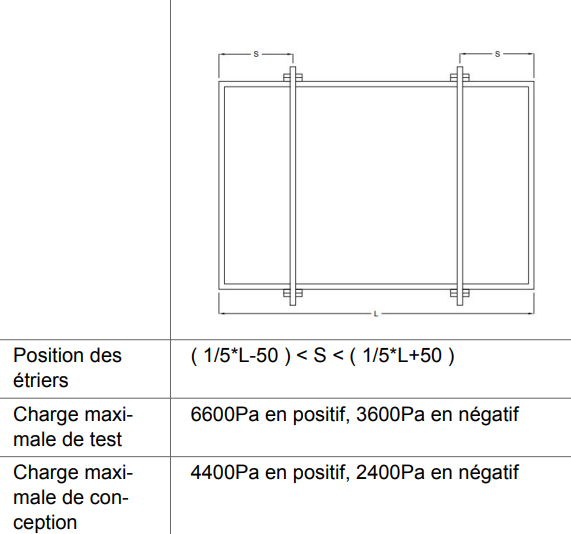
with L= 1722 so S between 294.4 and 394.3mm
Specific case of the steel deck :
For steel deck there are specific requirements to be followed that you can find here: How to install SPRING4 on a steel deck roof?
SPRING3 in portrait mode
Installation on a single line
4 SPRING3 panels
6 SPRING3 panels
Installation on 2 lines
SPRING3 in landscape mode
4 panels on the same line
6 panels on two lines
It is possible (but not recommended due to increased complexity) to combine fields of panels in portrait orientation with fields of panels in landscape orientation. If doing so, it is important to adhere to the following points:
There cannot be panels in both portrait and landscape orientations within the same hydraulic group (thus, a group must be entirely in portrait or entirely in landscape).
The hydraulic groups of panels must all be in parallel (as usual).
Multi-field balancing must be respected (see more details here).
The cold and hot water inlets into the panel groups must be respected (the cold water inlet is in a different location for portrait and landscape orientations; see details here).
Good to know
To facilitate their routing in a maximum of configurations, Dualsun hydraulic links have b een developed to allow a connection in portrait or landscape mode, so it is possible to adapt the hydraulic links according to the desired layout and also avoid the obstacles between the panels and the roof.
Depending on the installation configurations below, it is possible to make different types of layouts with Dualsun FLASH and SPRING solar panels.
|
|
|
|
Panel in portrait | Panel in portrait | Panel in landscape | Panel in landscape |

Thus the hydraulic links can be oriented in such a way as to avoid the rails of the installation system or adapt to the type of roof.
To find those information in the SPRING installation manual.
More informations: What are the different hydraulic layouts for Dualsun panels on residential roofs?