
How to install Dualsun SPRING3 panels?
To facilitate their routing in a maximum of configurations, the Dualsun hydraulic connections have been developed to allow a connection in portrait or landscape mode, it is thus possible to adapt the hydraulic connections according to the desired layout and also bypass obstacles between the panels and the roof.
Find out more about layout configurations possible with Dualsun DualQuickfit links.
Correct assembly SPRING3
Junction boxes on the same side
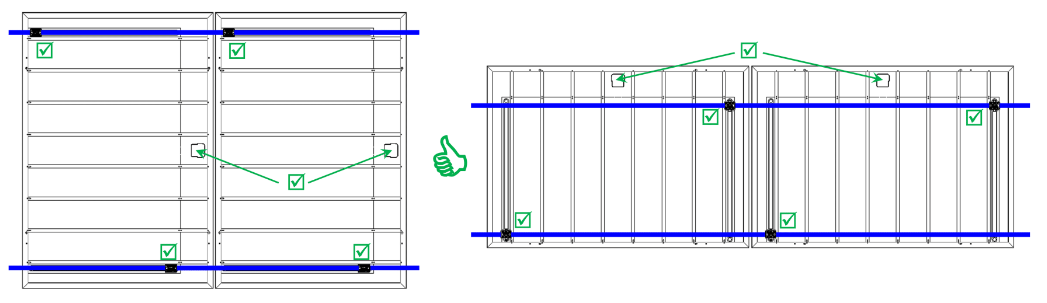
Important: be sure to install the panels DualSun SPRING SHINGLE with the junction box on the same side on each hydraulic line to connect the DualQuickfit hydraulic links. |
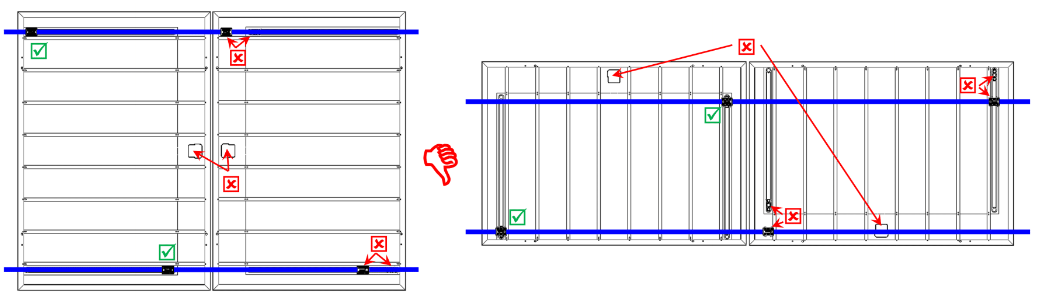
Incorrect assembly SPRING3
Junction boxes in opposition
For more information, see the SPRING installation manual.
It is important to distinguish between our two generations of SPRING currently available:
For more details on the specifications of the models, you can refer to the dedicated article: What material is used for the SPRING panel heat exchanger? |