How do I activate the warranty on my Dualsun installation ?
You are the installation end-user
1 - Log in to your MyDualsun account
If you are using the calculator for the first time, create an account by first filling in your project information here.
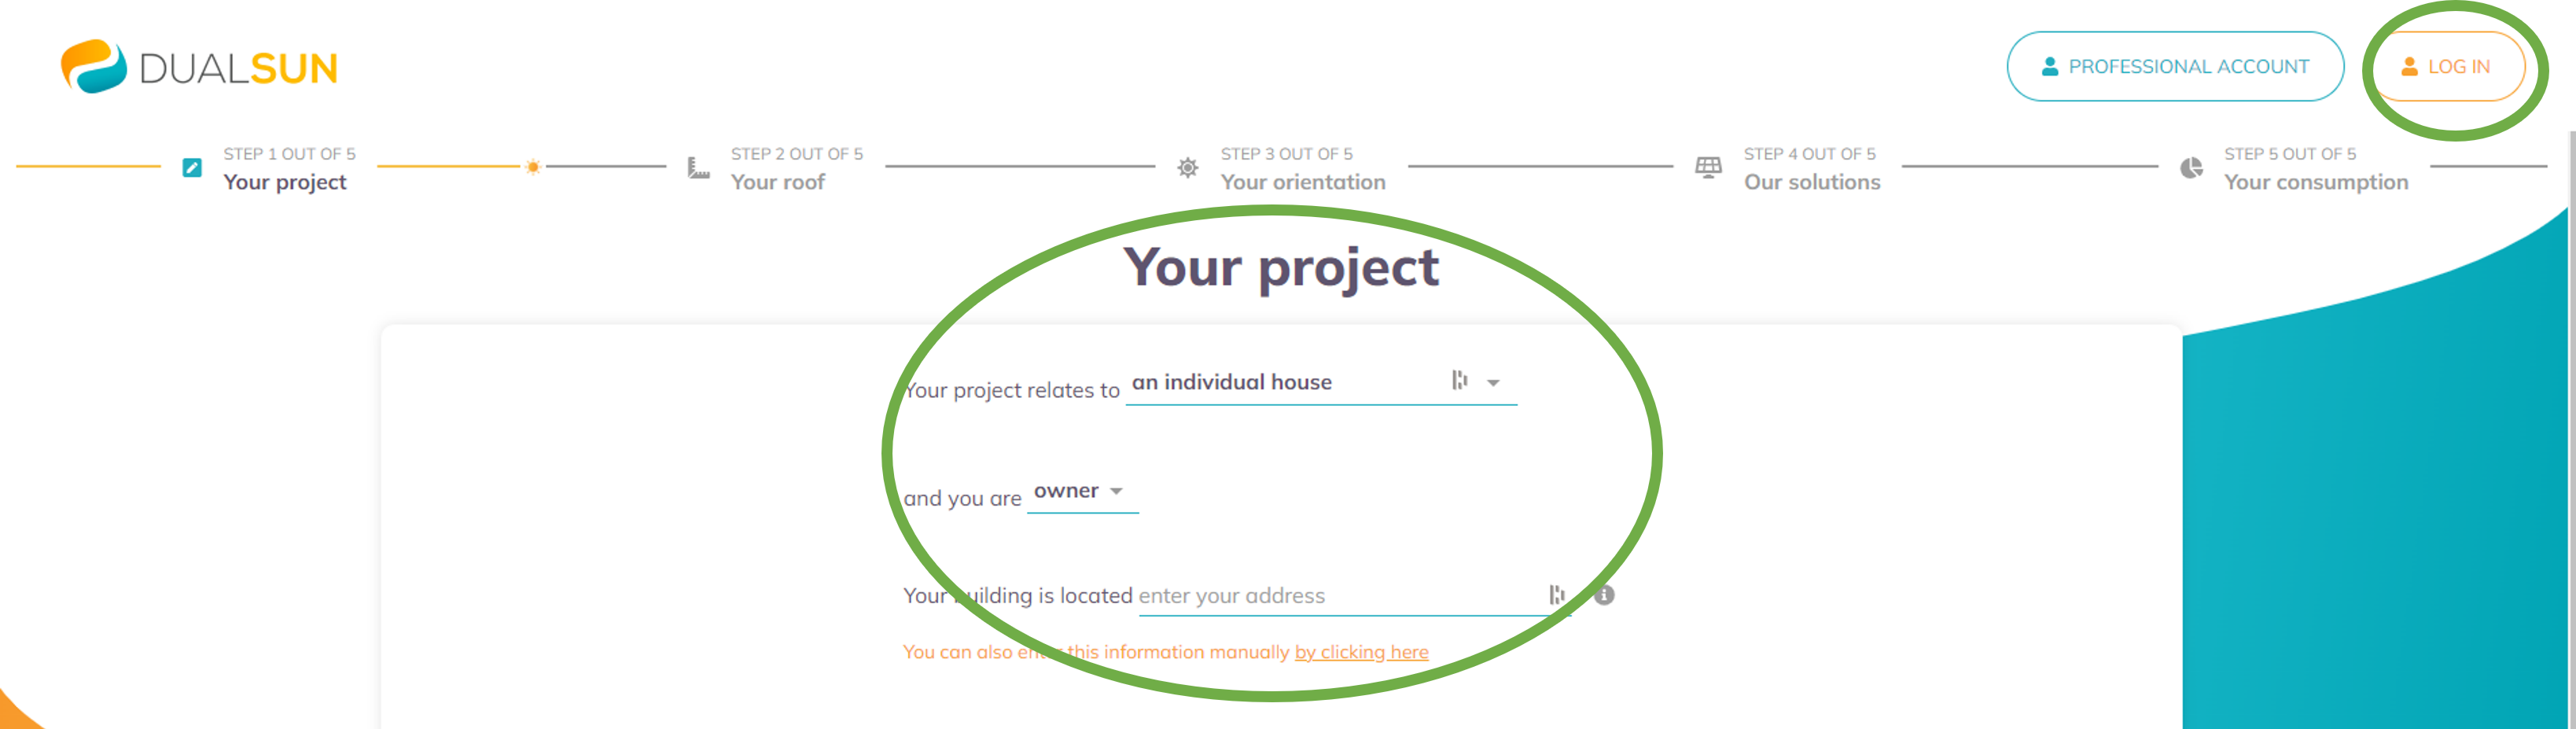
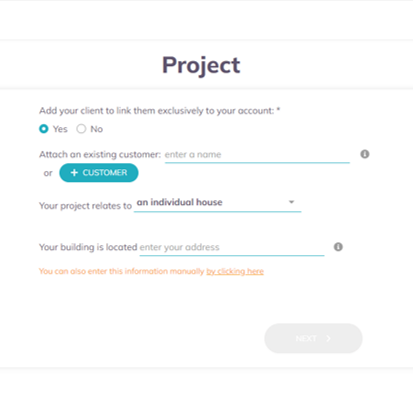
2 - Create your project
Fill in your project information :
If your project is already complete and up to date, click on “Activate warranties”
If your project is incomplete or not accurate, click on “Edit this project” (you will then need to go through all steps including “Your funding” in order to save your changes), then click on “Activate warranties”.
If your project doesn’t show on the list, click on “New project” on the left side bar. Create your project as if you wanted to have a new calculation done.
Only your address and the number of panels must be accurately filled in. For all other sections, if you don’t know the exact answer, you may provide an estimate.
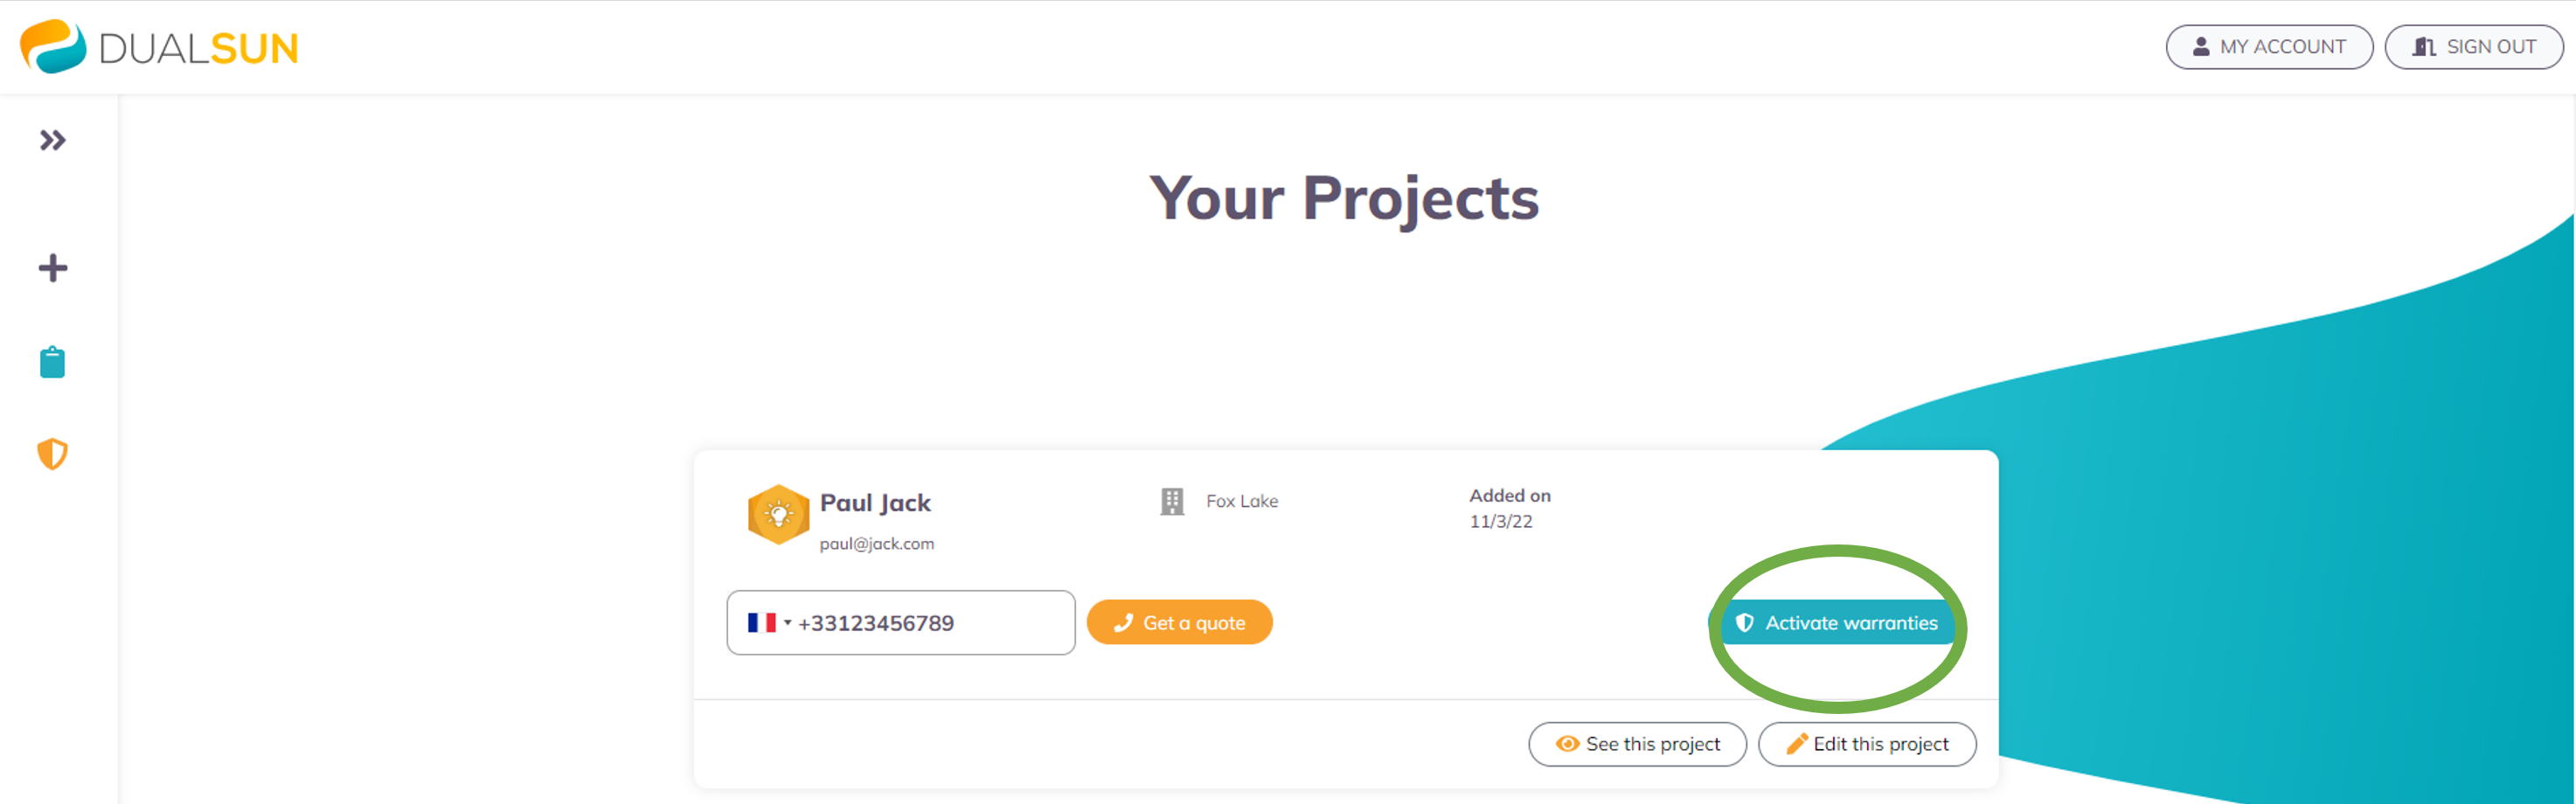
3 - Activate your warranty
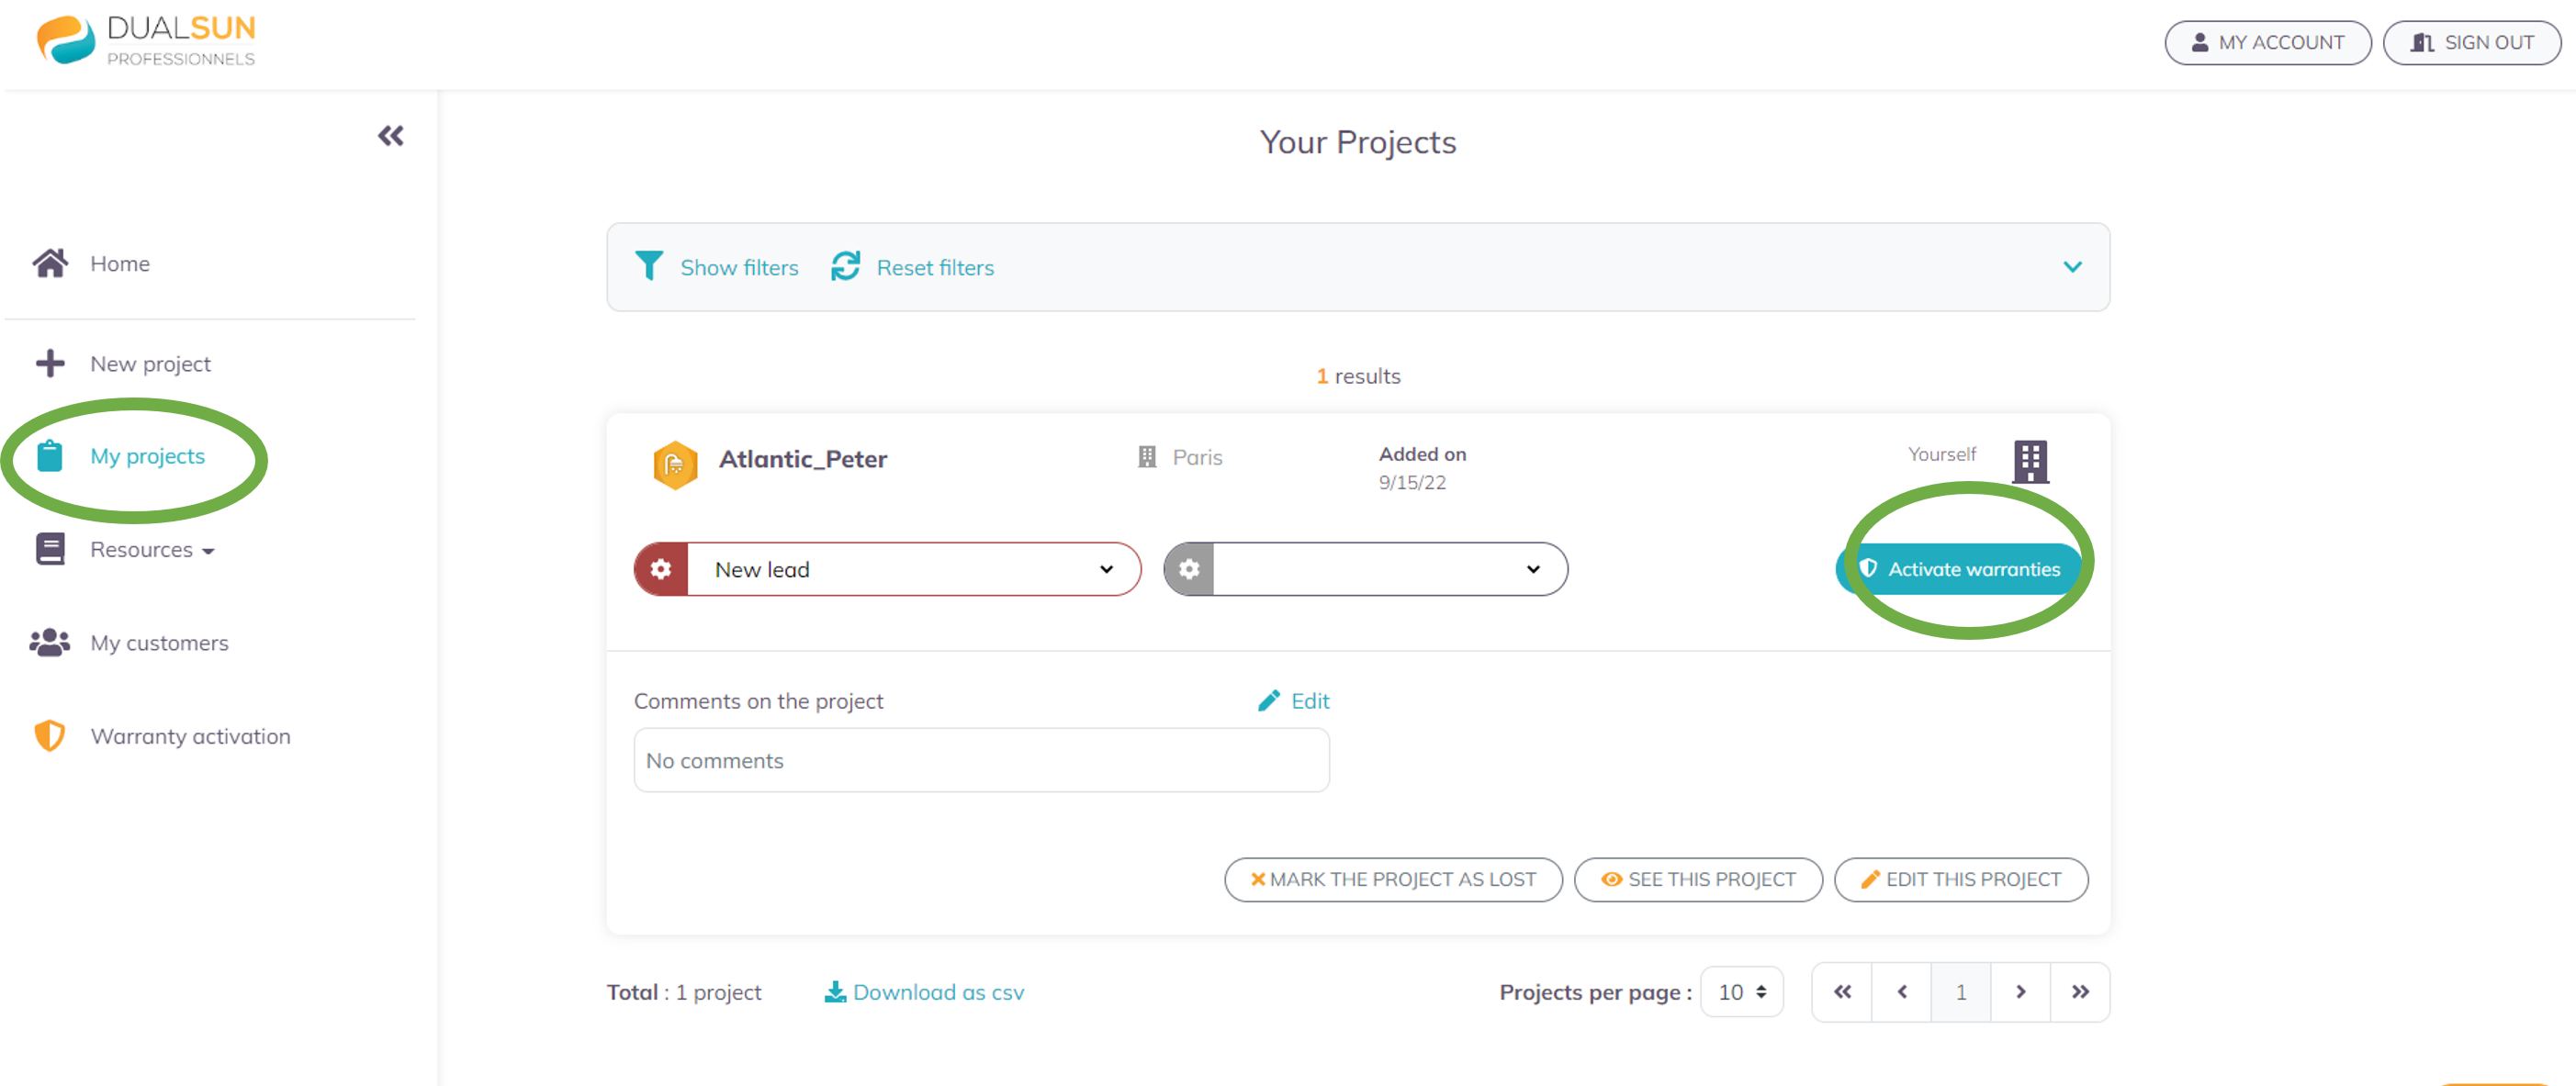
Now that your project is complete and up to date, click on “My projects” on the left side bar, then on “Activate warranty”.
If your project only includes Dualsun FLASH panels, just fill in the panels installation date (if other than the one shown above or if none is shown) as well as the installer’s name or the place where you purchased the panel if you are doing the installation by yourself.
If your project includes at least one hybrid Dualsun SPRING panel, please fill in the required information. You will find it on the commissioning report that you can request from the installer at the end of the installation set up.
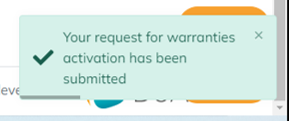
4 - Job well done!
A green box appears on the bottom right, indicating that your activation request has been submitted. It will be reviewed and approved by the Dualsun team.

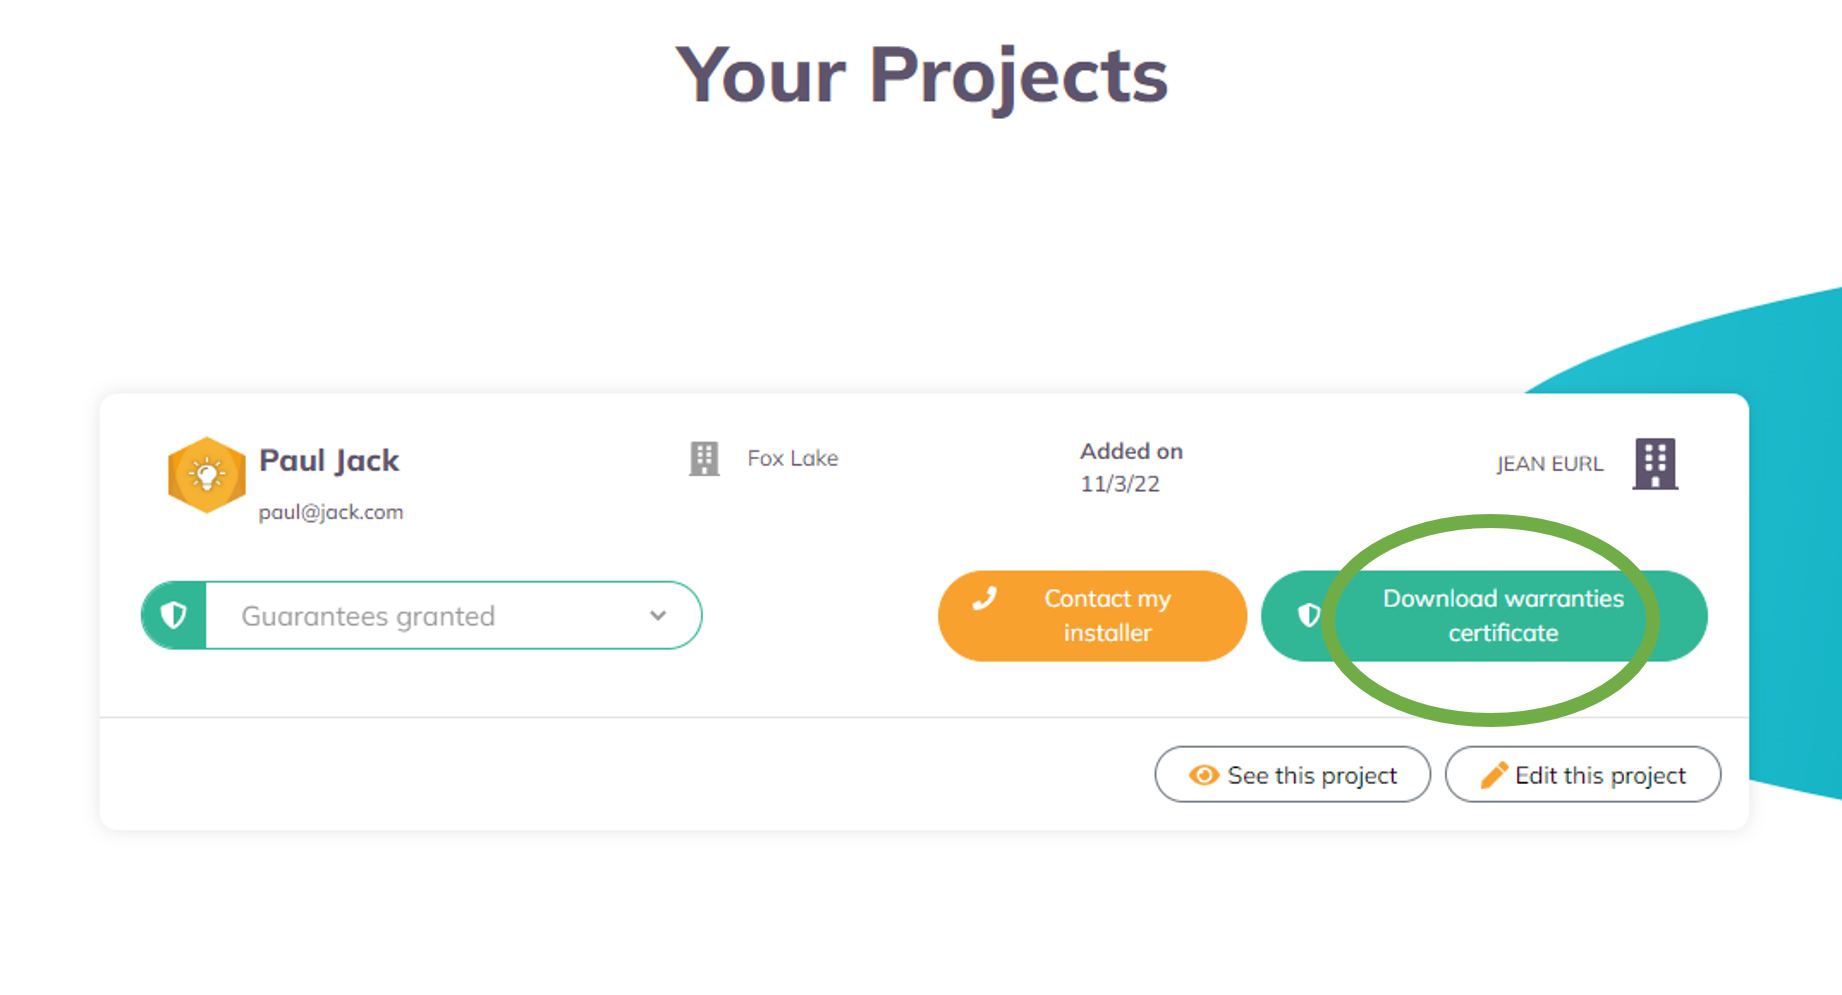
5 - Save your warranty certificate
Once your request has been granted by the Dualsun team, you can click on the appeared “Download warranties certificate” button. It will also be emailed to you.
You are an installer
1 - Log in to your MyDualsun account
or create an account if you are not yet registered
2- Create the project
Select the project on the list, or create it by clicking on “New project” on the left side bar, then follow the steps !
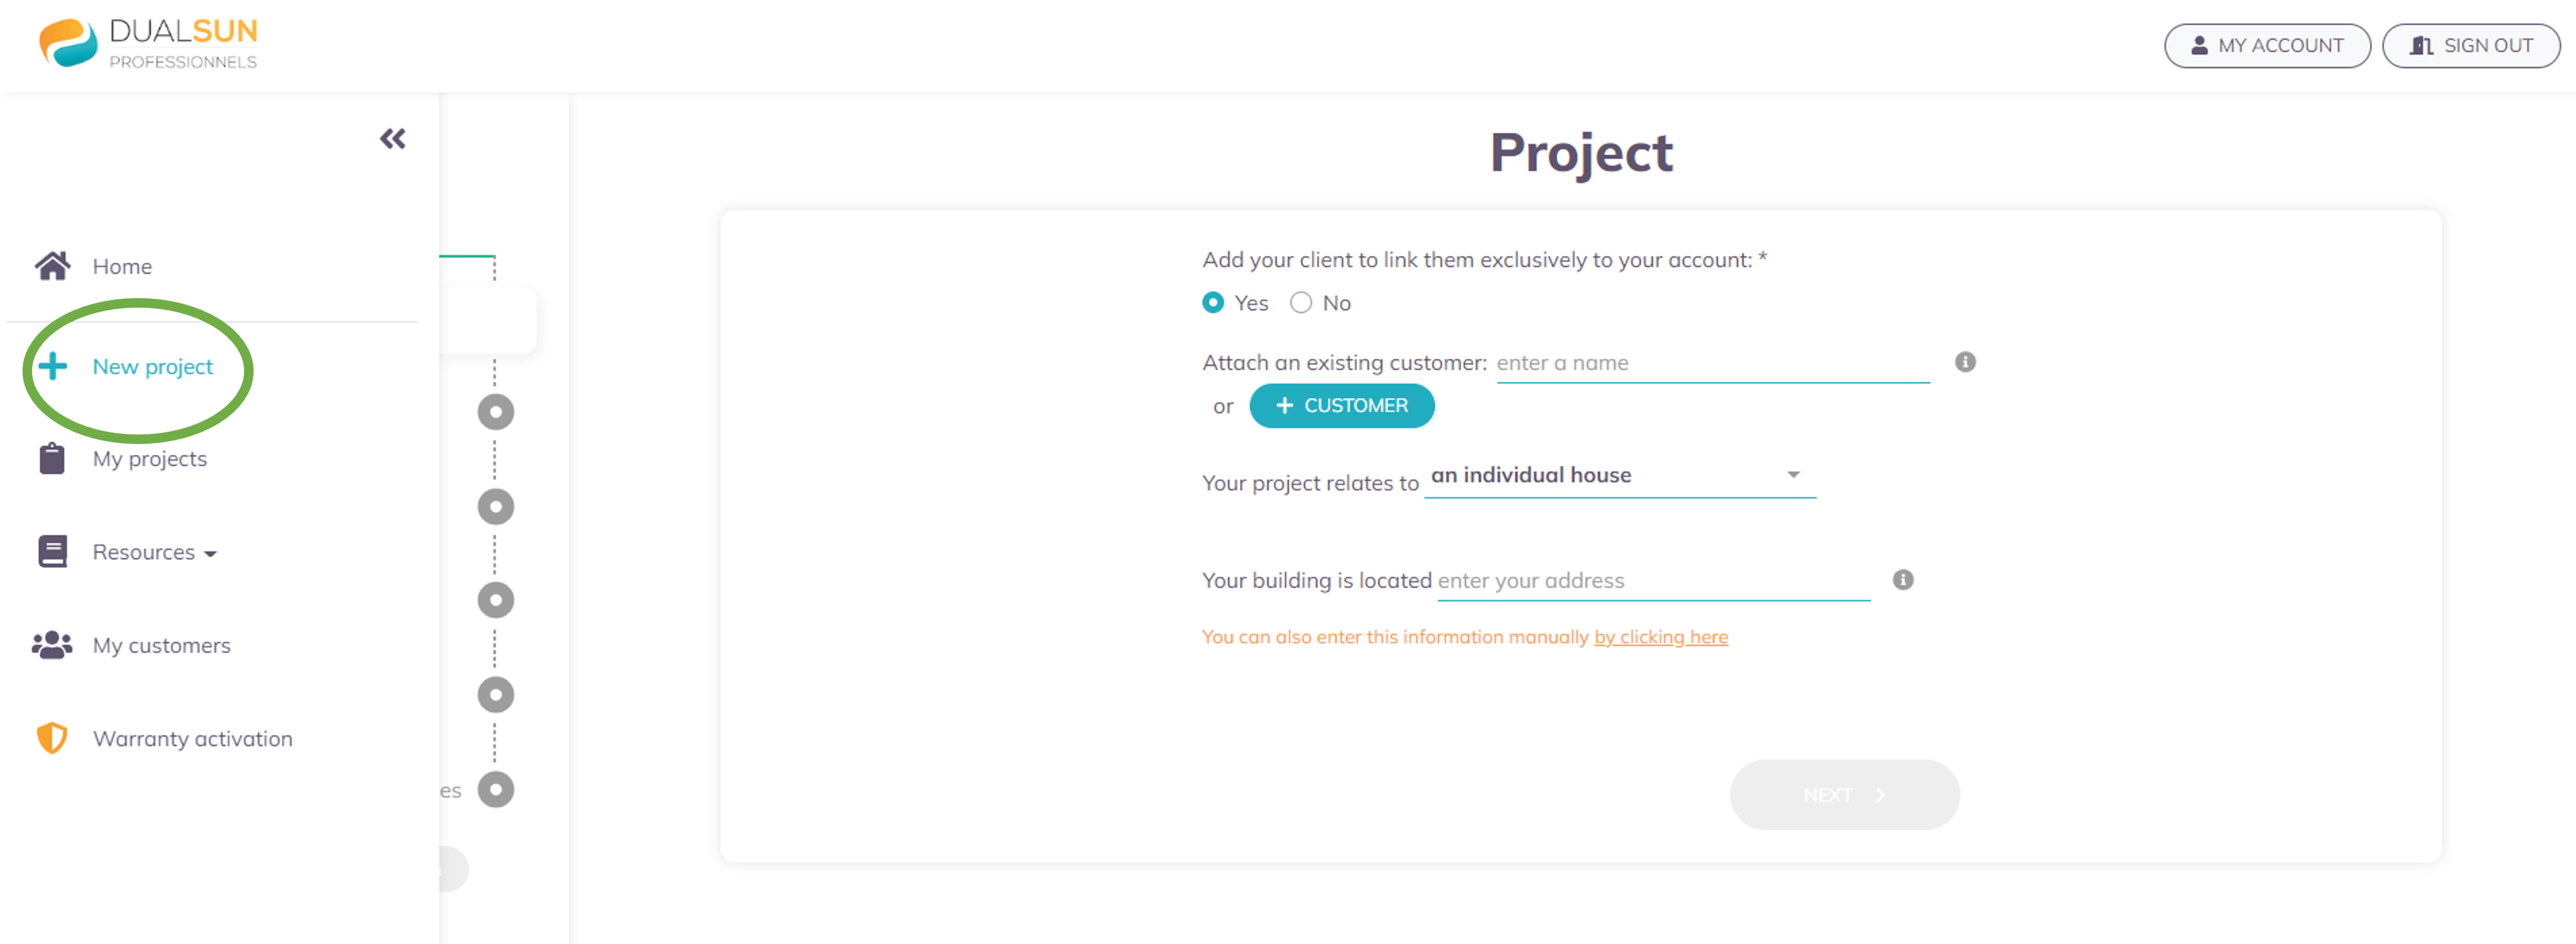
To activate the warranties, you must answer “Yes” to the first question. This will enable us to always redirect your customers towards you, even when they contact us directly, in order to ensure your commercial exclusivity.
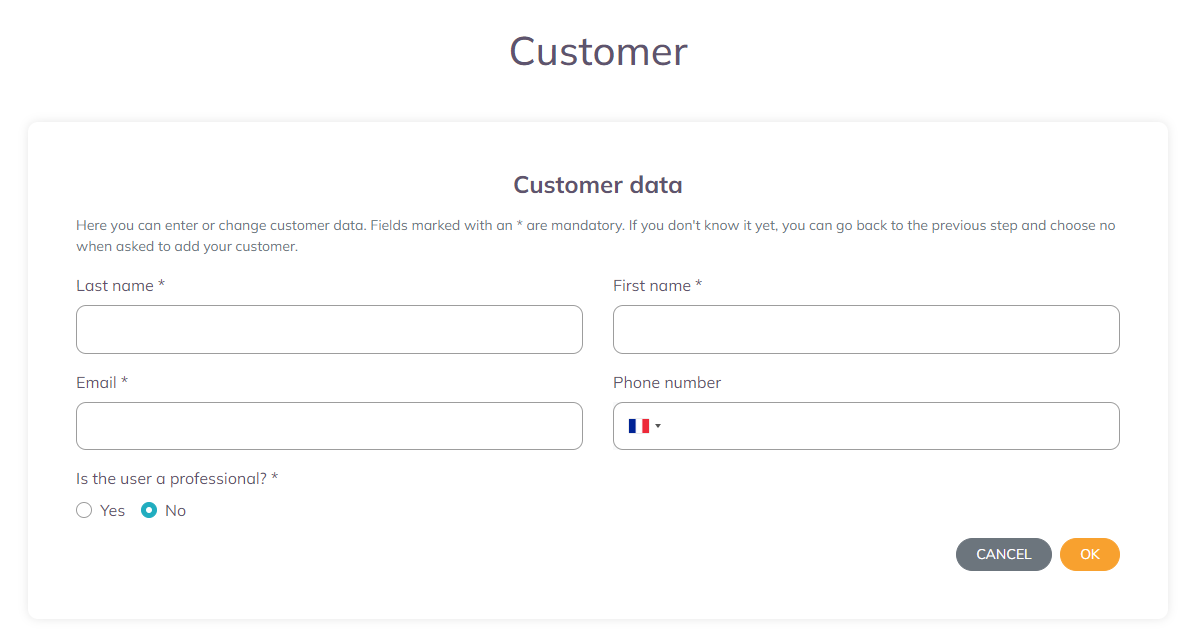
Fill in their contact information (name, first name, email address and phone number) as well as the address of the building on which the panels are installed.
If you encounter any difficulty at this step of the process, it might be because your customer has his own MyDualsun account : please report this with the “Report” button, we will manually add him to your customer list.
For the warranty to be correctly activated, please make sure that you accurately fill in the following information:
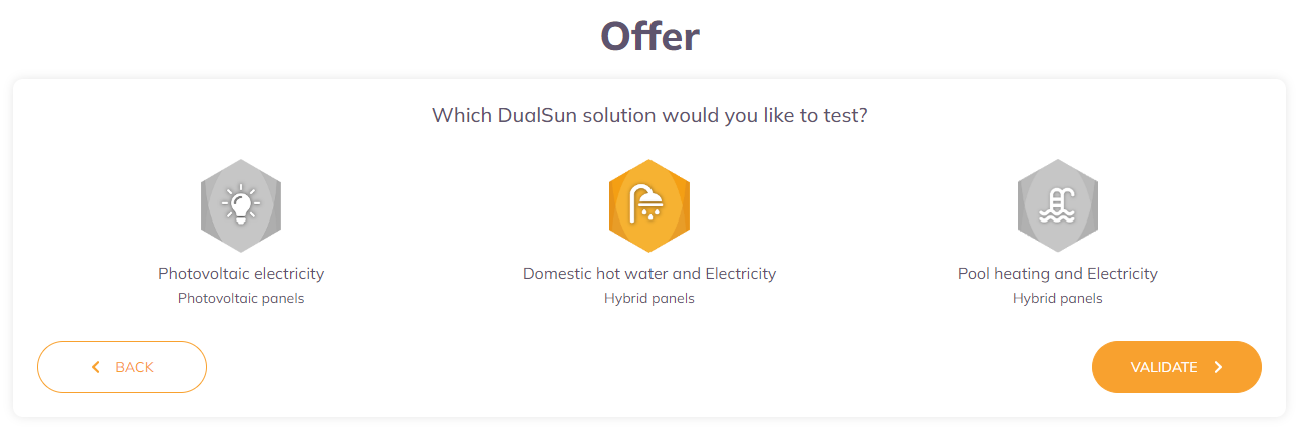
Offer:
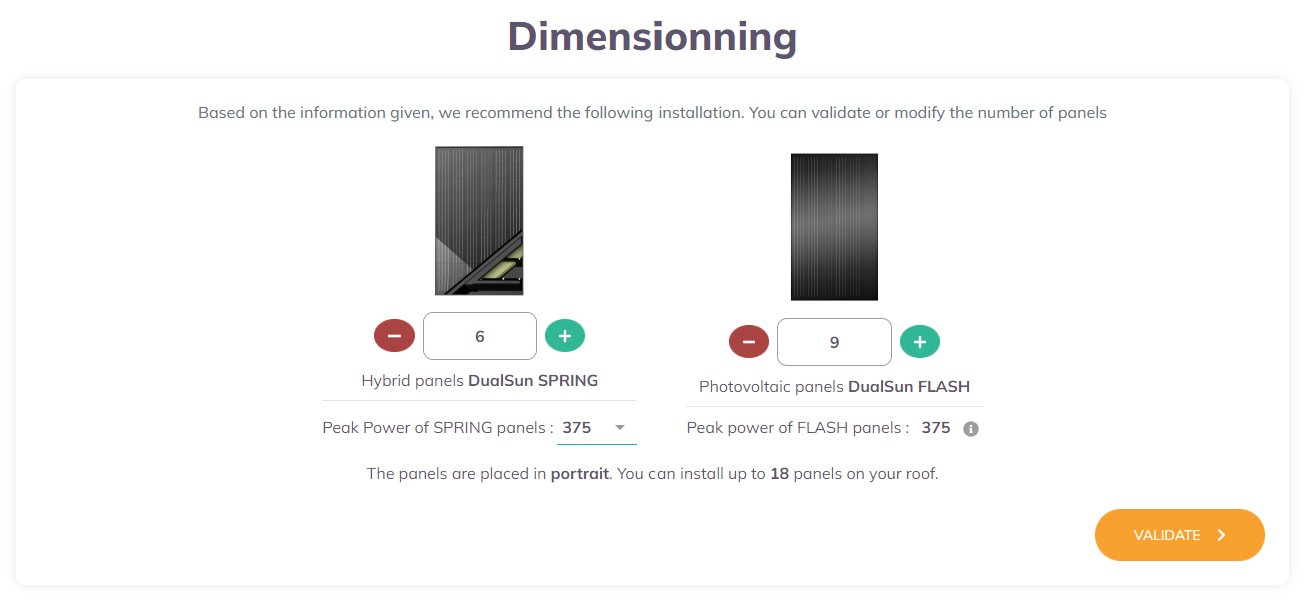
Number of panels and their peak power in Wp:
3- Activate the warranty
Once the project is saved, please click on “My projects” on the left side bar, then click on “Activate warranties”.
If the installation includes Dualsun FLASH panels only : the warranty is granted immediately.
If there is at least one hybrid Dualsun SPRING panel, please fill in all the requested information.
Don’t forget to ask the person who set up the installation to provide you with all the information right after.
4 - Job well done!
A green box appears on the bottom right, indicating that your activation request has been submitted. It will be reviewed and approved by the Dualsun team.